Thursday, October 27, 2011

HOW TO CREATE A 3D MODEL OF YOURSELF


HOW TO CREATE A 3D MODEL OF YOURSELF


Create Super-Realistic 3D Models in Minutes

Simply load one front-face and one profile photo (or sketches or artwork) into 3DMeNow 1.5™ and start modeling and animating 3D humans or characters straight away! Just line up the points to your images to create your model - then load in a standard *.wav file or record your voice to create stunning real-time 3D animations...

3DMeNow Professional is our top-of-the-range human modeling package. Used to build recognizable human and character models for interactive 3D games and broadcast animation, this software produces amazingly lifelike 3D head data (models, textures and morph states) in a fraction of the time taken with conventional manual authoring techniques.
Creates data suitable for use in 3DSMaxTM, MayaTM, SoftImageTM and most industry standard 3D authoring applications.

Cut production time

3DMeNow Pro™ v2; slashes production time on real-time and fully rendered 3D human/ character animation for games and full-motion-video: not only in the creation of your base state models and textures, but in animation production - simply build your model from photos or art, then automatically output up to 56 high quality morphs for facial animation and full lipsynch!

Key Features

3DMeNow Pro™ v2 offers all the features of v1 as well as:
  • New enhanced base models including head, bust and torso
  • Enhanced morph targets
  • Enhanced modeling and texture-mapping
  • Export formats:*.3ds/ *.lwo/ *.vrml/ *.X/ *.xsi/ *.stl/ *.obj/ *.RAW/ *.lwo/ *.bio
  • Realtime output with new audio compression for amazingly low-bandwidth interactive content
  • Full Screen Video file output
  • Batch morph target export
Biovirtual 3DMeNow Pro allows the creation of real-time and fully rendered 3D heads for games and full-motion-video.
It makes not only base state models and textures but animation.
The application automatically generates blended morph states for lip sync and facial animation.
Working from just 2 photos, side and front, you can create 3D photometrical head models.

Simply load one front-face and one profile photo (or sketches or artwork) into 3DMeNow 1.5™ and start modeling and animating 3D humans or characters straight away! Just line up the points to your images to create your model - then load in a standard *.wav file or record your voice to create stunning real-time 3D animations...

Features:

Animation

Animation with 3DMeNow™ v1.5 is incredibly easy - and amazingly powerful. Build-up complex animations from a palette of 35 available actions, simply by dragging them onto the timeline. With automatic lipsynch, as well as automatic idling animation - anyone, beginner or professional, can quickly assemble a realistic and expressive animation sequence appropriate to the speech.

Actions

With actions you can make your models act in virtually any way you want: actions include whole- face emotions (happy, sad, angry etc) as well as part- face expressions (smile, frown, squint etc); looks (eyes and whole head rotations) and crazy morphs. Fine-tune actions on the timeline to create incredibly realistic, as well as hilarious animations of all kinds.

Sound

Record your speech (or anyone else's!) directly into 3DMeNow™ v1.5 - or load any *.wav file for instant, automatic animation. Edit and optimize the audio for efficient web distribution. Apply effects to change the way your voice sounds for serious, and comic effects.

Export

3DMeNow™ v1.5 exports scalable *.bio files for web, presentations and emails: you can ouput models at high, medium and low detail as well as choose audio and image output resolution.

Glasses

Spectacles can be fitted to a model at any point in your project: choose from 15 available styles, select your frame colour, lens colour and transparency - and fine-tune into position.

Hair

You can model hair in two ways with 3DMeNow™ v1.5 - use the traditional method of drawing-out the perimeters, or choose from one of 60 prebuilt hairstyles as well as ponytails using the new integrated hair modeling wizard. 
UPDATE - v2.0-

Features:New enhanced base models including head, bust and torso.Enhanced morph targets.Enhanced modeling and texture-mapping.Export formats:*.3ds/ *.lwo/ *.vrml/ *.X/ *.xsi/ *.stl/ *.obj/ *.RAW/ *.lwo/ *.bioRealtime output with new audio compression for amazingly low-bandwidth interactive content.Full Screen Video file output.Batch morph target export.


New enhanced base models including head, bust, torso as well as new accessory objects
User-definable mapping throughout, including separate eyes and teeth
Enhanced morph targets
Enhanced modeling and texture-mapping
Automated lipsynch from audio (from standard *.wav files)
Text-to-Speech lipsynch animation
Keyframe animation
Realtime output with new audio compression for amazingly low-bandwidth interactive content
Full Screen Video file output
Batch morph target export
Scalable (subdivision surface) geometry, morph data and texture export
Polygonal 3D Data Export Formats now include: *.bio, *.3ds, *.lwo, *.vrml, *.xsi, *.x, *.obj, *.raw, extended *.raw, *.stl

DOWNLOAD HERE

Tuesday, October 25, 2011

Hack facebook Id some one

Hack Email Password
Hack Email password, how to hack into someone's Email account, hack Email password, how to hack Email, hack Email, how to hack a Email account, how to hack Email passwords, Email hack.
Start Hack Any Email Password
Hacking process usually takes less than 10 minutes, which returns 98% positive result. However, it is not always possible to hack all Email passwords, because some accounts are well protected or damaged (approx. 2%).
Please use this site to crack your own lost password only. We are not responsible for any misusage of our services.
How to hack. It’s a very often asked question with around 1,000,000 Google searches each month. Are you curious to this common question "how to hack Email password"? Well then this site is just for you. Most people ask me to tell them some ways to hack Email password and this site is the easiest way to hack Email password. Anyone that runs a hacking related website get's asked this question daily. After searching the internet for a decent answer to this question, you found me. So this is your time to decide to get the answer! Learn to hack, learn how to hack Facebook, hack MySpace, hack MSN, hack Gmail, hack Orkut, securty tips, password retrieval and much more.
You now have the ability to start hacking into someones Email password regardless of your skill set, regardless of your location.
How to hack into someones Email, Email password hack, how to hack someones Email, hacking Email, how to hack Email password, Email password hacker, hack Email passwords, how to hack someones Email account, hack Email account, hacking Email passwords, how to hack a Email password, how to get someones Email password, Email hacking, Email hacker, learntohack.co.uk/hacking, Email hack passwords, Email hack password, how to hack someones Email password, how to hack Email accounts, how to hack a Email account for free, hacking Email accounts, Email passwords, Email password, hack Email accounts passwords, hack someones Email password, learn to hack Email, hack into someones Email account.
 
Past by Dadhi ram khanal

Create your own Proxy Server site and Access Blocked Websites!


Create your own Proxy Server site and Access Blocked Websites!

Sharing is Sexy : - -
- - -- - -
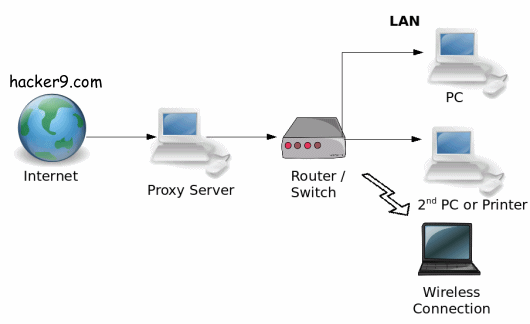
Proxy site allows you to access Blocked or restricted sites. Normally Schools, colleges and even some offices block or restrict certain websites for example “Social Networking” sites like facebook, twitter, etc. There are thousands of proxy sites available. But the one thing which is common in all the sites is that they also show you loads of advertisements, which is quite Frustrating. and also there is possibility that the admins form schools and offices might have already blocked some common proxy sites.
Our Proxy Site: Surf.hacker9.com
Create your own Proxy Server site and Access Blocked Websites at college school office proxy sites 2010 2011In this Tutorial am going to show you how you can create your own proxy server site and unlock all the restricted sites. we will see two methods. you can try whichever you feel easy to go with.
1. Using Glype proxy script (Free Proxy Project)
2. Using Google Apps engine (inbuilt project)
So lets start with Method #1 since it is easy and quick.

-Using Glype proxy script

This method requires you to have a “Webhosting account” (which is free and quite simple to register) and a “Glype proxy script” file.
note: The Problem with free hosting is that, as soon as they come to know that you are using Proxy Script, they will Ban you. so the Smart choice is to Get a Paid hosting account for 1 month, costs just $4/month ( $25 in Discount, for 1 year)
Step 1. Just download the Glype proxy script Zip file and don’t bother to unzip it.
Step 2. The next step is to Get a Web-hosing account with Subdomain.  In this tutorial i have usedDoteasy Free Hosting.
Recommended: Hostgator WebHosting (20% off coupon code- Spring)
note: Do not use ‘proxy’ word in the subdomain while registering for free webhosting account, you will get banned. instead use your name.
Step 3. After your account gets Active, just Login to your “Control Panel” and Click on “File manager”. This will Show you the directories.
Step 4. Click Open “Public_html” Directory and then click “Upload” button.
Step 5. Now in the Archives(zip,tar) Section, browse and locate your downloaded glype-1.1.zip file and Click “Green Check Button” (See the Screen Snap)
Step 6. After Uploading Just visit your website in the new tab and You should now see your own Proxy site.
Step 7. Just type in any web address and see if it works, that’s it.

-Using Google Apps engine

This method is quite difficult but doesn’t require a “webhosting account” account. all you need to have is ‘Google account’.
Step 1. Download Python 2.6.4 from here and Install it. Google Apps engine requires “Python” to Run, which acts as a platform.
(Windows user’s click on “Windows x86 MSI installer(2.6.4)(sig)”)
Step 2. Once you install Python 2.6.4 on your PC, the next step is to download the “Google apps engine SDK” for python (URL):
Step 3. Now launch the “Google apps engine” that you just installed on your PC.
Step 4. This step is to Download “Python proxy Script” which you can load here. After downloading just extract it to “Desktop”.
Step 5. After doing step4 just Go to http://appengine.google.com and sign in with your Google account.
Step 6. Click on “Create an application”(verify your account) and give a name and title to your app and save it.
Step 7. Now go back to your “Google apps engine” that you launched in step3 and click on file >> Add existing application. Now in the pop-up box select the extracted “Python proxy Script” file that you just created in step4 and click “ADD”.
Step 8. After clicking “ADD”, select ‘your_app_id’ and Click on ‘Edit’ icon. In the Application field replace “your_app_id” with the name of your app that you saved in step6.
Step 9. After editing, close the Edit window and Click on “Diploy” icon. Now enter your Google account and click Ok.
Step 10. Now Go back to your web Browser and Enter your App URL for example mine ishacker9proxy.appspot.com. you should now see your proxy server.
Note: Keep your proxy site secret. Never tell your proxy URL to your Classmates or Colleagues because if admin of your organization comes to know about this, he will certainly block or restrict your proxy site.

I hope you are done with your proxy server. If Any doubts or difficulties, your comments are appreciated.

IP Tracing and iP tracking


http://www.ip-adress.com/ip_tracer/


IP Tracing and IP Tracking (115.187.16.3)
Want to trace or track an IP Address, host or website easily? With our highly reliable IP Address Location Database, you can get detailed information on any IP Address anywhere in the world. Results Include: Detailed IP Address Location, Name Of ISP, Netspeed/ Speed Of Internet Connection And Lots More.
  Examples: 213.86.83.116 (IP address) or google.com (Website)
115.187.16.3 IP address location & more:
My IP address [?]:115.187.16.3 [Whois] [Reverse IP]
My IP country code:NP
My IP address country:ip address flagNepal
My IP address state:n/a
My IP address city:Kathmandu
My IP address latitude:27.7167
My IP address longitude:85.3167
My ISP [?]:Triveni Complex
My Proxy:None / Highly Anonymous
Organization:Triveni Complex
 
More about my IP and my system:
My Speed:Cable/DSL [Speedtest]
My Browser [?]:Chrome 2.0
My Operating System [?]:Win7
Referer:Unknown

Monday, October 24, 2011

-Mail लाई अन्लाईन Hard Drive को रुपमा Use गर्नुहोस्


-Mail लाई अन्लाईन Hard Drive को रुपमा Use गर्नुहोस्


तपाईंहरु मध्य धेरैलाई थाहा छ जिमेल एउटा फ्री वेब मेल सर्भिस हो जसले अहिले सम्म २ गिगाबाइट फ्री स्पेस दिने गरेको छ तपाईंको ईमेल Inbox र Attachments को लागि । २ गिगाबाईट भनेको धेरै स्पेस हो र यदाकदा तपाइँले पनि सोच्नुभएको होला यत्रो २ गिगाबाइट स्थान के राखेर भर्ने होला ? अझ धेरैलाई त यत्रो स्पेस किन चाहियो र भन्ने पनि लागेको हुन सक्छ । तपाईंले पनि यस्तै सोच्नु भएको हो भने यसो गरे कसो होला कि जिमेल ले फ्री मा दिएको स्पेसलाई अनलाइन Hard Drive को रुपमा use गर्ने र आफुलाई चाहिने फाइलहरु त्यस्मा save गर्ने जुन आफुलाई चाहिएको बेलामा जहाँ जुन सुकै स्थानमा भए पनि ति फाइललाई सजिलै पाउने । यसो गर्न सकियो भने त important फाइलहरु एक ठाउँ बाट अर्को ठाउँमा लान PenDrive, सि.डि वा धेरैनै ठुलो फाइल छ भने ल्यापटप बोक्ने झन्झट बाट मुक्त भईने भयो नि हैन र ?
हामीले सजिलै आफ्नो जिमेल अकाउन्टमा भएको फ्री स्पेसलाई Online Hard Drive को रुपमा use गर्न सक्छौ ।
कसरी ? भन्ने बारे मैले तल चर्चा गर्न लागेको छु ।

यसको लागि तपाईंहरुले एउटा सानो आकारको एउटा software इन्स्टल गर्नुपर्ने हुन्छ र यो software इन्स्टल गरीसकेपछि तपाइँको कम्प्युटरको My Computer आइकनभित्र सी, डी, ई जस्ता हार्ड ड्राइभ जस्तै गरी जी मेल ड्राइभ पनि देखिनेछ ।


अब अरु drive हरुमा जस्तै आफुलाई चाहिने फाइलहरु त्यहा copy paste वा Drag Drop गर्नुहोस् । फाइल upload हुँदा यस्तो देखिनेछ ।


Software Download गर्न यहाँ क्लिक गर्नुहोला


software install गरी सकेपछि तपाईंको जिमेल account मा पनि थोरै परिवर्तन गर्नुहोला त्यसको लागि तलको Step अनुसार गर्नुहोला ।

१) सबैभन्दा पहिला तपाईंहरुको जिमेल account हुनु जरुरी छ, यदि छैन भने account बनाउनुहोस् र छ भने लग अन गर्नुहोस् ।
२) अब त्यहा Create a filter लिन्कमा क्लिक गर्नुहोस् जुन Search the Web बटन सँगै छ ।

३) Subject मा GMAILFS राखीदिनुहोस् र next बटनमा क्लिक गर्नुहोस् ।

४) Skip the Inbox (Archive it) भएको चेक बक्समा tick लगाइदिनुहोस् र Create Filter बटनमा क्लिक गर्नुहोस् ।


बस जिमेलमा गर्नु पर्ने काम सकियो, अब तपाईंले Gmail Drive मा upload गर्नु भएको फाइलहरु automatically तपाईंको inbox बाट bypass भएर Archive मा save हुन पुग्छ । Archive मा save भएको फाइललाई हेर्नको लागि त्यहा भएको All Mail लिन्कमा जानुहोस् अथवा माथिको सर्च बक्समा सिधै GMAILFS टाईप गरेर search mail बटनमा क्लिक गर्नुहोस् त्यहा उक्त फाइल हरु एट्याचमेन्टका रुपमा त्यहाँ बसिरहेको हुन्छ । ति फाईलहरुलाई तपाईंले आफुलाई चाहिएको बेलामा जहाँ जुन सुकै स्थानमा भए पनि सजिलै Download गर्न सक्नु हुन्छ 

online storage tips